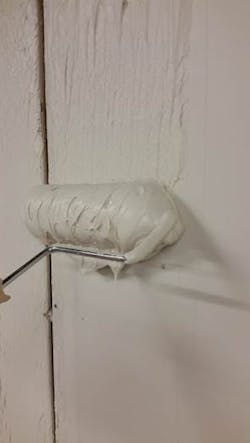
Applying Drywall Compound With a Textured Roller
Many of us have applied the roller method (i.e., rolling thinned-down joint compound on ceilings or walls) when we are doing some texturing work, but how many have tried the roller method for finishing coats?
I discovered the concept on one of my drywall jobs years ago when we were matching a texture on a blended ceiling. The process was simple; we thinned down some compound and rolled it over the drywall and then created the texture with a stomp brush. In the region where I work in upstate New York, we do very little texturing. But for those regions where textured finishing is popular, this idea may help reduce unnecessary labor costs.
We applied the compound with a roller because the areas in between the stomped texture appeared to have a roller type texture. We finished the texturing and then started to apply the finish coat over the seams in the adjoining rooms. We were still hand-taping at the time, so the process then was to apply a slightly thinned compound over the seams and outside corners that already had a dry fill coat applied. The compound was applied with a 12-inch wide taping knife, and then removed with the same taping knife, leaving on just a thin skim coat of compound. The compound was left on a little heavier in the areas that required it, and all edges were feathered out nice and tight.
This was a very physical process because there are hundreds of feet of seams and corners in just a small home. One of the guys on the job was having trouble with his arm because of all the repetitive motions involved with this coat of compound. He suggested we try using the paint roller we had just used for the texturing to apply the compound for our finish coats.
We would still have to smooth and remove the compound with a taping knife, but avoiding all that strenuous work of first applying the compound with the taping knife will not only help prolong a tapers’ career, it also increases production!
RELATED
- Details Matter: The Proper Direction to Hang Drywall
- How to Avoid Drywall Problems From Truss Uplift
- Conquering Drywall Cracks
5 Steps to Apply Compound With a Textured Roller
A job like this can be done alone or as a two-person crew. In either case, it is important to apply the compound a little at a time in smaller areas, so that the compound cannot dry before it is removed. Below identifies five key steps to applying compound with a roller:
1. Thin down the compound with water to about the consistency of thick pancake batter (consistency used when coating inside corners with a corner box and finishing head).
2. Use a 9-inch roller cover with a ½-inch or ¾-inch nap. Dip it in the compound and shake of some excess if you find you are dropping too much compound.
3. Slide the bottom edge of the roller across the bucket edge to remove the dripping compound from the bottom of the roller.
4. Now apply the compound to the seam or outside corner. Apply enough pressure so that the roller turns slowly but still leaves the surface covered with compound. I can usually get about 8-feet coated with each application. Consider the drying conditions and apply as much compound as you can before it starts to dry.
5. Using a 12-inch wide knife and a mud pan remove the compound. All you need to leave is a skim coat in most areas and where more is needed more can be left. The excess compound is just dumped back in the bucket.
NOTE: As you work the compound will start to dry out in the bucket because moisture is lost by continually applying and removing the material. So you will occasionally have to remix with additional water and some added compound. Don’t over thin or the compound will not adhere as well.
Admittedly, the finish coat can be applied to seams using a 12-inch box (which is what I use on all my larger taping jobs). But there are still a lot of finishers who hand-tape only. In fact, I was just visiting my son in the Denver area. He is a project manager for a large construction company. In the development they are building 85 homes this year and all are hand-taped. Applying compound with a paint roller could save them some back-breaking work.
For a complete list of finishing products offered by CertainTeed, click here.


