Skip to navigation Skip to main content Skip to footer
flexiblefullpage

Residential Products Online content is now on probuilder.com! Same great products coverage, now all in one place!

billboard
This article first appeared in the PB October 2013 issue of Pro Builder.

Firmly entrenched as the focal point of a casual lifestyle, the kitchen isn’t just the heart of the home. “In today’s world, it is the home,” says Greenwood Village, Colo., interior designer Lita Dirks. Buyers of new production homes at nearly every price point expect a lot from the kitchen, including islands and lots of cabinet and countertop space.

It may seem daunting to accomplish this goal in a moderately priced house; however, if enough care and thought is given to the layout and specifications, it’s possible to design a professional-looking kitchen without blowing your budget.
Buyers are willing to sacrifice square footage in dining rooms, living rooms, and other areas in order to have a bigger kitchen, says Michael Menn, principal of Michael Menn Ltd., a design/build firm headquartered in Northbrook, Ill.

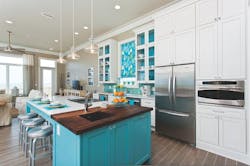
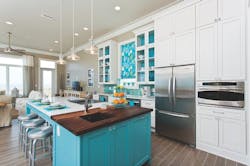
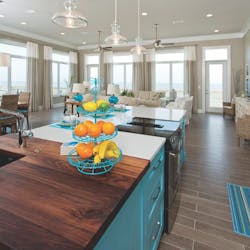
Designed for efficient food preparation and cleanup, one section of the countertop is made of black walnut and has a prep sink. White glass-front cabinets have turquoise backs that highlight dishes and glassware. The flooring is porcelain tile. Designer: In Detail Interiors; Photos: Greg Riegler Photography
Islands have become standard in homes that are 2,000 square feet or larger, Menn says. And nearly all of the floor plans offered by North Salt Lake, Utah-based Woodside Homes include islands, says Jay Moss, chief marketing officer.
Dirks calls the island “the jewel in the setting. It’s where everything happens, and the bigger the better because it’s used for so many things.” But, as Menn points out, even a 4-by-4-foot island can be functional.
Some builders still install two-level islands, but Dirks believes a one-level island is more useful and costs less to build. “Just adding an interesting shape to the island countertop will heighten visual appeal,” she says. “The base cabinets don’t change.”

Cabinet chat


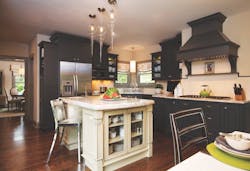
You’d never guess this kitchen was designed and built on a budget. The island offers generous seating areas and plenty of counter space, ideal for households with multiple cooks who love to entertain. Note that the cabinets run all the way to the ceiling, giving them a built-in, custom look. The room won best Budget-Friendly Kitchen and earned second place in the medium-size kitchen category in in the National Kitchen & Bath Association’s 2013 design competition.
Cheryl Kees Clendenon, owner of In Detail Interiors, Pensacola, Fla., is averse to golden oak or light maple cabinets because the colors are difficult to work with. “If all else fails, use white,” says Clendenon. “It’s not old school—it’s classic.”
17 Ways to Freshen Up Kitchens
Make kitchen layouts island-centric whenever possible. The bigger the island, the better, but even a 4-by-4-foot island can work well.
Use two-tone or contrasting colors and/or materials on countertops, cabinets, and appliances. For example, paint the upper cabinets white and use a dark stain on the lower cabinets, or paint the island one color and the perimeter another.
Add a second sink to the island for food preparation. The prep sink can also be filled with ice to keep beverages chilled during a party.
Forget about the double-bowl sink. Buyers perceive deep, single-bowl models as more expensive. For an extra flourish, install an apron-front or farmhouse sink.
Use granite or a solid surface, such as quartz, for countertops for both good looks and durability.
Include 42-inch cabinets as standard, and upgrade the door hardware. Drop the soffit and run cabinetry all the way to the ceiling.
Space permitting, include a walk-in “Costco” pantry for storage of mega-size items, or build a floor-to-ceiling storage cabinet.
Use frameless cabinets. They work with any design style, have a cleaner look, and do a better job of utilizing space because they lack a center rail.
Keep clutter off the island. Include a planning center or computer alcove nearby for charging electronics, doing homework, paying bills, etc.
Put shelves and doors at one end of the island to store cookbooks, dishes, and glassware.
Change up the cabinet-door hardware. “Get rid of the plain brass or silver round knob,” says Pensacola, Fla., interior designer Cheryl Clendenon. “Step out of the box and use something that’s got a little more personality.”
Utilize shallow compartments under the sink and stovetop for additional storage.
Get rid of the fluorescent light boxes and use a mix of recessed or track lighting, decorative lighting, and under-cabinet lighting. Put lights inside glass-front cabinets.
Instead of a more expensive counter-depth refrigerator, put in a standard-depth model and build out the cabinets around it. You can also borrow space from an adjacent room to create an alcove for the refrigerator, or recess it into the wall between studs.
Install matching panels on appliances to give them a built-in look without purchasing built-in appliances.
Fill out the backsplash with a single material in a single color. If the countertops are granite, for instance, you might make the backsplash out of ceramic “subway” tile or mosaic tile, which comes in sheets for easier installation.
Substitute engineered wood floors or porcelain tile for solid wood. Porcelain tiles are available that resemble wood but can handle more wear and tear.
Dirks recommends making 42-inch-high cabinets a standard feature.
“Keep them straight across the top,” she advises. “It’s a newer look that looks expensive but actually costs less than placing them at different heights.”
Another way to add panache is to run cabinetry all the way to the ceiling. “Many buyers see that space above the cabinets as a dust collector,” says Dirks. “Instead, I would drop the soffit so the cabinets look custom and built in. You can also add one or two glass doors, but don’t do arched doors on the uppers.”
Even one special touch can add immeasurably to the kitchen’s perceived value, Clendenon says, such as a pantry with doors designed to look like a hutch.
Be sure to include white and/or cream in your cabinet colors. “I’m not talking about the old thermofoils; I’m talking about white- or cream-painted cabinets,” Dirks says. Also include dark tones at the opposite end of the spectrum, such as ebony and espresso. “With stains, make sure you offer more brown tones than yellow or red undertones. You could even offer a gray paint or stain, since gray is coming on strong.”
Painted cabinets can save money, agrees Susan Brunstrum, principal of Sweet Peas Design, Libertyville, Ill. “They’re typically less expensive than stained because there are some decent composites available now,” says Brunstrum. “You can also do a two-tone treatment such as stained cabinets on the island and painted cabinets on the perimeter.”
She favors large, deep drawers in lieu of lower cabinets. “They’re better for storing pots and pans, cookie sheets, Tupperware, and even plates, and kids can reach them.” Drawers with full-extension glides should be standard in every home regardless of price, Clendenon adds.

[PAGEBREAK]

Counter points and floor facts


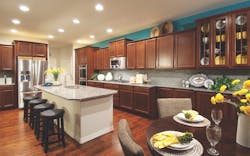
Warm stained cabinets stand out against neutral subway tile in the backsplash and teal accent paint above. Community: Cordera; Builder: Campbell Homes; Designer: Lita Dirks & Co.; Photo: Paul Kohlman
Granite countertops are now ubiquitous in new homes even at the entry level, partly because the material has become very affordable. “I still see laminate [countertops], but I very rarely see tile,” Moss says.

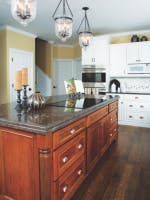
The furniture feel of this island makes it a perfect complement to the adjacent living areas. Note the mix of door hardware styles and the island countertop’s beveled edge — small touches that have a big impact. Photo: Jerry Kalyniuk
Clendenon and Dirks prefer solid surfaces such as quartz, which has a clean, crisp look with less patterning than granite and costs approximately the same. “Granite is not what it used to be, unless it’s an exotic [variety],” Dirks says.
If you’re set on granite, keep in mind that the slabs can be cut horizontally instead of vertically so that the pattern looks more striated. “It’s called a vein cut,” Brunstrum says. “The price point isn’t a whole lot different, but it makes a unique statement.”

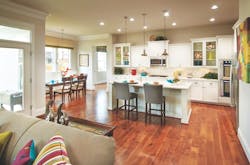
Crisp white cabinets with glass-front doors and a tile backsplash laid on the diagonal contrast with warm wood flooring. The beadboard detail on the island adds a custom touch. Community: Stapleton Conservatory Green; Builder: Parkwood Homes; Designer: Lita Dirks & Co.; Photo: Vic Moss
Many production homes nowadays have wood flooring in the kitchen. Clendenon favors darker wood tones because they allow more decorating freedom than a golden oak or very light wood floor. “Do something that’s going to be easiest for [buyers] to imagine their furniture in,” she says.
Tile is a good flooring option for kitchens that have more separation from the other living areas, but never use a cheap-looking tile. “It dates a job very quickly,” she says.

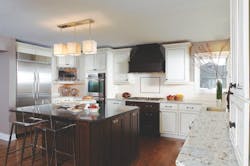
This kitchen is a feast for the eyes with its mix of inset and overlay door styles, cabinet hardware, light and dark tones, and materials. Designer: Sweet Peas Design; Photo: Jerry Kalyniuk

[PAGEBREAK]

Don’t design it yourself


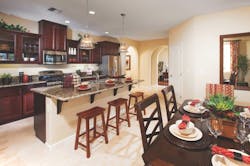
Rich, dark cabinets and deeply veined granite countertops elevate the kitchen of Plan 3 at Northbrook above the home’s $280,000 price tag. Northbrook is a community by Woodside Homes in Stockton, Calif. Photo: Woodside Homes
Brunstrum’s final piece of advice for builders is to let a specialist handle the kitchen design. “To try to design a kitchen on your own is a mistake, because you’ll end up with vanilla,” she says. “Hire an interior designer or a kitchen designer, and/or a cabinet designer. They can add so much more to your layout, and it doesn’t need to break the bank.”

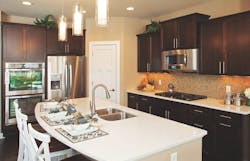
There’s no reason dark and light can’t mix. The kitchen of the Saratoga plan at Summit Pines in Inver Grove Heights, Minn., a Pulte Homes community, features quartz countertops with a tile backsplash. The island has ample space for dining, serving, and food preparation. Photo: Pulte Homes
Remember that a well-done kitchen can make or break a house, says Clendenon: “It’s worth it to pay up front for a little creativity in the design process, because it can set you apart.”

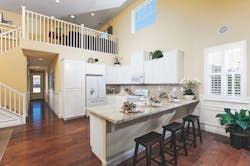
This kitchen is the centerpiece of the Balboa plan at Bella Brisas, a Woodside Homes community in Sacramento, Calif. It has a peninsula for dining and is a bright, airy space that integrates well with the rest of the home. Crisp, white cabinets and appliances, granite countertops, and a tile backsplash offer balance and contrast. Photo: Woodside Homes
Storage is maximized by putting shelves and glass doors at one end of the island. Chandelettes (mini chandeliers) over the island pack a bigger design punch than track or recessed lighting, but don’t cost much more. Designer: Sweet Peas Design; Photo: Jerry Kalyniuk

iWall Guides Customer Choices

Kitchen design defines a buyer’s taste, which in turn drives the look of the house, says Jay Moss, chief marketing officer for Woodside Homes in North Salt Lake, Utah. To help buyers determine their design style and make appropriate selections, Woodside developed the Inspiration Wall or iWall, a visual aid that salespeople use to help customers navigate that process.
“Buyers first answer a 10-question survey [that classifies their style as] contemporary, classic or eclectic, then select cabinet packages and other kitchen finishes that complement each style,” Moss says. “They can mix and match and change, and since we offer umpteen combinations, they can’t make a mistake.”
Woodside works closely with interior designers, architects, and cabinet manufacturers on a variety of options for each floor plan. “In a lot of cases even the island has options, such as a built-in table,” Moss says.

Woodside Homes uses the Inspiration Wall (iWall) to help buyers coordinate their design selections with the style that best represents their taste.
leaderboard2
catfish1