Flawless Hardwood Flooring Installation Starts From Underneath
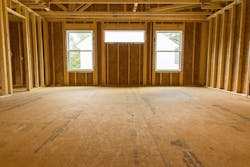
Hardwood flooring is one of the most sought-after finishes for today’s homebuyers, and for good reason—it’s durable, feels great underfoot, and offers a high-end, timeless look. But achieving the perfect aesthetic requires installation savvy and attention to detail, not just to the flooring itself, but to the framing and sub-flooring below.
Hardwood installers know better than anyone the importance of a quality sub-floor installation—after all, when expansion and movement lead to nail pops and cracks, it’s the hardwood installer who gets the first call. “We go in after the sub-floor is installed, but because we cover it, we know a lot about it,” says Jeff Firkus, account manager for Contract Interiors in St. Paul, Minn. “Half of the service work we do, is not servicing our product, it’s tearing ours apart because we need to get to the sub-floor.”
Here are best practices Firkus employs when considering the relationship between the sub-floor and the hardwood flooring above:
Value engineer your options
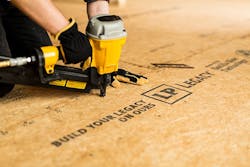
Premium sub-flooring products do come at a premium cost, but it’s important to consider the installation savings possible when the likelihood for callbacks is reduced and the product is warranted for edge-sanding. One example is LP Legacy® sub-flooring, which offers superior moisture resistance and carries a “Covered until it’s Covered™” no-sand guarantee.
To create savings, Firkus encourages builders to consider different areas of the floor separately and plan the sub-floor accordingly. For example, he worked with Lennar to upgrade to LP Legacy on the first floor of its homes and then specify a lower-grade sub-floor for the second level, where the exposure to the elements would be much shorter and therefore be less prone to moisture concerns.
Nail sub-floor properly
Another issue Firkus encounters is when sub-floor installers don’t set nails all the way; if not corrected, this can lead to increased movement of the sub-floor, more likelihood for nail pops, and a less stable hardwood floor above. Firkus says this occurs with 50% of his projects, so his crews end up starting their jobs by first pounding down the sub-floor nails, wasting time.
Watch your humidity levels
In the summer, Firkus typically reminds builders to install dehumidifiers in under-construction homes unless the A/C can be run two weeks prior to hardwood installation to help equilibrate the sub-floor moisture content.
In the winter, hardwoods need a consistent 65-degrees temperature to be successfully installed, so heaters will be required and, with the resulting dry air, humidifiers.
Operating dehumidifiers or air conditioning is often overlooked during construction. Upgrading to a moisture-resistant, premium sub-floor is an alternative way to help mitigate moisture variations.
Consider your reputation
By dramatically reducing the likelihood of callbacks and torn-up floors due to the hardwood failures above, using a premium sub-floor can help production builders buck the quality stigma and can help custom builders cement their reputations for higher performance. Explains Firkus, “When you have builders who are using best practices, like installing premium sub-flooring, that speaks volumes to me on how focused they are on building the best homes for their customers.”
Follow manufacturer instructions
Above all, follow directives from both the hardwood flooring maker and the sub-floor manufacturer, including fastener type and placement, drying times and moisture content, and adhesives. Installation instructions are created following after lengthy testing procedures—and warranties typically hinge on those instructions being followed to the letter.
For more information on LP Legacy, visit www.lpcorp.com/legacy.


