The growth of the green, energy-efficient homes market has led to an increased demand for high-performance building envelope products such as structural insulated panels (SIPs).
What Are SIPs?
Typically composed of a layer of EPS (expanded polystyrene), XPS (extruded polystyrene), or polyurethane foam sandwiched between oriented strand board panels, SIPs can provide R-values for walls, floors, and roofs ranging from 14 to 58, depending on panel thickness and composition. SIPs also are manufactured to spec, which means there’s little waste and potential labor savings over traditional stick-frame construction.
However, working with structural insulated panels does have its challenges, especially for first-time users. To help shed some light on common problem areas, we asked Frank Kiesecker of SIPs manufacturer ACH Foam Technologies, in Denver, to provide key tips and do’s and don’ts when working with the technology. Kiesecker offers the following advice:
1. Pre-plan electrical and equipment needs
Since SIPs are manufactured to meet the project’s specifications, it’s important to plan for electrical chases in advance to prevent time consuming and sometimes costly modifications during installation. For example, SIP facings should never be cut horizontally for the installation of electrical wiring; doing so will compromise structural performance.
In addition, during the design phase, it’s important to determine whether there are any equipment needs for the installation of the panels. If the project specifies roof panels or wall or floor panels larger than 8x8 feet, a forklift or crane may be required for installation.
RELATED
- Frequently Asked Questions About Structural Insulated Panels
- Better R-Values With Blown-in Insulation
- Moisture-Control Techniques for Wood-Framed Homes
2. Organize the panels for installation
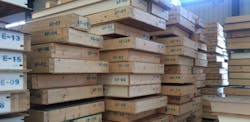
Proper storage, weather protection, and handling will make the installation process more efficient. Store the panels on a level spot, no closer than three inches to the ground. Organize the panels by the sequence in which they will be installed (that is, first floor separately from the second floor), and make sure they’re covered with a breathable protective tarp to keep them dry.
3. Install SIPs right and seal tight
SIPs need to be fully supported during installation. The panels slip over a wall plate, which needs to be set half an inch from the building edge to ensure that the panels are fully supported. Also, make sure to set the panels in place in order—start in the corners or valleys and work outward. Once installed, all panel joints and voids must be properly sealed using adhesive or SIP tape to minimize air leakage and maintain the structure’s long-term durability.
4. Protect SIPs from water penetration
Once SIPs have been installed and sealed, weather protection such as housewrap is required to prevent moisture deterioration. Follow the housewrap manufacturer’s installation guidelines, and make sure to flash all penetrations. Windows over time will eventually leak some water at the sill. Use flashing under and around the units to direct water away from the wall structure.
5. Right-size your HVAC system
One common mistake is underestimating the high insulating and air sealing properties of structural insulated panels when selecting an HVAC system. SIPs allow for smaller HVAC equipment. When working with an HVAC contractor, make sure they take into account an estimate for lower levels of air infiltration. Proper HVAC sizing is critical because an underused system will fail to reach a steady operating rate, resulting in short cycling, which is less energy efficient and requires more maintenance.
Here are important factors to consider when determining HVAC sizing:
- Size of home (each floor should be analyzed individually)
- Orientation of building
- Type of wall construction and associated R-value
- Window and door specs, including number of units, location, insulation value, and fenestration rating
- Duct location (i.e., in heated space, unheated space, attic, crawlspace, etc.)
- Number and type of fireplaces
- Amount of air Infiltration
SIPs Do’s and Don’ts
- Do provide adequate support for SIPs when storing them. Store SIPs laying flat and covered.
- Do study installation drawings before setting panels.
- Do remove debris from plate area prior to panel placement.
- Do provide level and square foundations or floors that support SIP walls.
- Do provide adequate bracing of panels during erection.
- Do hold sill plate back from edge of floor system ½ inch to allow full bearing of SIP OSB facings.
- Do provide 1 1/2-inch diameter access holes in plating to align with electrical wire chases in SIPs.
- Do store sealant and SIP tape in a warm area for best application results in cold weather.
- Do always follow manufacturer’s recommended joint sealing techniques.
- Do place sealant along the leading edge of wood being inset into panel.
- Do use sealant on wood-to-wood, wood-to-EPS, and EPS-to-EPS connections.
- Do use SIP tape or equivalent vapor retarder on roof panel joints.
- Do install proper flashing and sealants around all rough openings and penetrations as required.
- Do use only continuous 2-bys, I-beams, and insulated I-beams for spline connections.
- Do use proper underlayments for roofing and siding. SIP walls are airtight without housewrap, but they do need a drainage plane material.
- Do install plumbing in interior walls. Furr out interior sections for pipes if necessary.
- Do provide adequate ventilation to maintain indoor air quality.
- Do use termite- and mold-resistant materials when required.
- Don’t leave panels exposed to the elements for long periods of time.
- Don’t lift SIPs by top OSB facing or drop SIPs on corners.
- Don’t install SIPs directly on concrete.
- Don’t cut wall panel skins horizontally for installation of electrical wiring or overcut the OSB facings for field-cut openings. Use factory provided chases in SIP core.
- Don’t be afraid to field trim panels for an exact fit.
- Don’t install recessed lighting inside the panels.
- Don’t put plumbing in SIPs.
- Don’t install or use unvented combustion equipment such as vent-free gas logs, fireplaces, or heaters in an airtight SIP house.
