MORE IN CATEGORY
ADVERTISEMENT
Residential Products Online content is now on probuilder.com! Same great products coverage, now all in one place!

A long-lasting home requires a sturdy subfloor. Whether you’re a seasoned veteran or a fledgling framer, here are eight back-to-basics subflooring strategies to ensure durability and strength—and fewer callbacks.
1. Keep it dry. When the OSB arrives on site, cover it with plastic; use blocks or spacers to ensure edges and all surfaces top and bottom are open to the air to ensure it stays dry and so the wood fiber in the OSB can adjust to on-site humidity conditions. If the OSB is wet, it will need to dry out to ambient moisture levels before installation of underlayment or finished flooring.
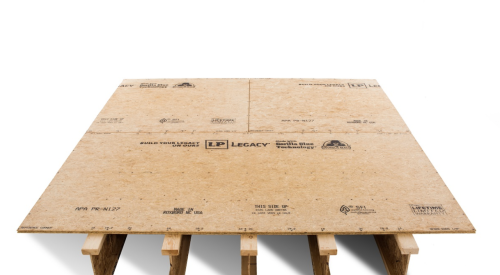
2. Look for the APA stamp. Only use products that are APA-rated sheathing or APA-rated Sturdi-I-Floor®. Also, verify the panel’s span rating.
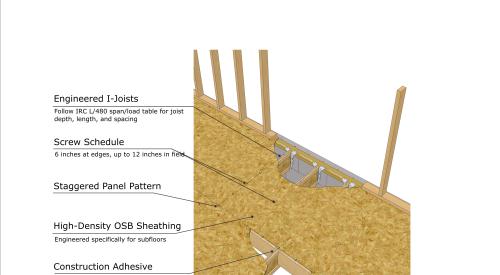
3. Plan out installation. Before installing OSB, plan your installation patterns. Stagger the seams, which adds to the stability of the floor and the structure.
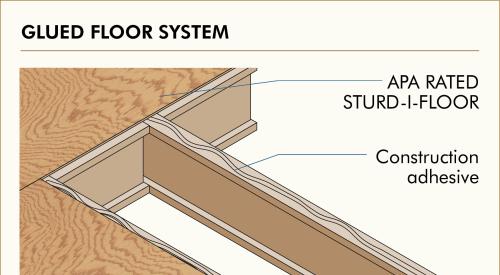
4. Apply adhesive. Lay down a bead of elastomeric polyurethane construction adhesive to add to the structural integrity and cut down on squeaks. Don’t work too far ahead—just a panel or two at most—to ensure the adhesive doesn’t develop a skin and lose some of its holding power.
5. Fit panels snugly—but with caution. You want a snug fit for the panels’ tongue and groove, but do not take a sledge hammer directly to the OSB edge—it can crush the fibers and ruin the smooth edges; instead, use a block of wood to buffer the blow of the sledge hammer.
6. Leave space. Leave a 1/8-inch gap for the panel ends to accommodate the natural changes in OSB dimension as it adjusts to on-site humidity and moisture. Tongue-and- groove edges are self-gapping.
7. Fasten. Use 6d ring- or screw-shank nails or 8d common nails spaced 6 inches on-center along panel ends and edges over the framing and 12 inches on-center at intermediate supports.
8. Check your work. Check for squeaks and loose panels. It’s much easier to fix flaws now than after the finished floor is installed.