What Builders Can Do to Ensure a Solid Hardwood Floor
For most new-construction projects, installation of the hardwood floor falls to a flooring specialist. But ensuring success starts long before that contractor arrives, with a solid, dry sub-floor.
“Squeaky floors have lately been one of the biggest reasons for callbacks,” says Brett Miller, vice president of education and certification for the National Wood Flooring Association. And the causes of those squeaky floors typically have little to do with the hardwood itself, but rather with the moisture content and related movement of the sub-floor underneath and how that affects the ability of the flooring fasteners to hold.
Here’s how builders can help set the stage for success by properly preparing the sub-flooring for finished floor installation.
• Protect materials: Builders should protect sub-flooring materials from rain and moisture during transport and on-site storage; sub-flooring that’s exposed to too many wet/dry cycles can lead to squeaky floors down the road. If the sub-flooring does get wet, ensure it has enough time to dry out and adjust to the surrounding moisture content before the finished flooring is installed.
• Consider a higher-quality sub-floor. “If the sub-floor is premium, it’s more stable without much end lift and not much sanding required,” says Miller. “It also means less concern about how moisture changes the density, which may affect how well the fasteners hold.”
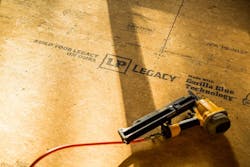
LP Legacy® premium sub-flooring, for example, boasts superior moisture resistance and carries no-sand warranty coverage which extends from installation up to the time the finished flooring materials are installed over the sub-floor panels.
• Install dehumidifiers: Builders should install dehumidifiers in under-construction homes (unless the A/C can be run two weeks prior to hardwood installation) to ensure the sub-floor doesn’t retain excess moisture, advises Jeff Firkus, account manager for Contract Interiors in St. Paul, Minn. Upgrading to a premium sub-floor that offers superior moisture resistance is one way to eliminate this step.
In the winter, hardwoods need a consistent 65-degree heat to be successful, so heaters will be required and, with the resulting dry air, humidifiers.
• Consider the crawlspace: The IRC recently made the change to start requiring a Class 1 or 2 vapor retarder on the underside of the joist system over unconditioned crawl spaces in climate zones 1A, 2A, and 3A, Miller says. This key step can help prevent moisture from getting into the sub-floor system from below, and is something for builders to consider even if it hasn’t yet reached their local code requirements.
• Protect floors during painting: Even after the home is enclosed, sub-flooring will need to be covered during “wet” installations, such as painting, which can introduce more moisture.
• Pay attention to joist spacing: With more builders moving to 24-inch-o.c. spacing of joists, floorsystems are more prone to greater deflection, which can lead to separation, squeaks, and other noise. For these floors, NWFA recommends upgrading your OSB or plywood sub-flooring to 7/8”, thicker than most building code requirements of 23/32”.
If not, NWFA requires its installers to add a 15/32” plywood overlay before installing the hardwood, a cost the builder will need to factor into the budget. They also need to accommodate the added thickness in areas such as around exterior doors, in kitchens,and attransitions to other floorcoverings.
• Set nails completely: If the sub-floor isn’t nailed properly, pops and movement can occur, notes Firkus. Make sure nails are set all the way so the flooring installer doesn’t have to come behind to fix the problem.
Many issues with finished flooring can be avoided by upgrading to a premium sub-floor such as LP Legacy, which can save the time and the hassle of edge sanding.


