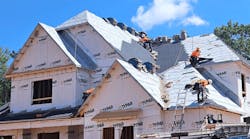
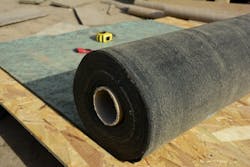
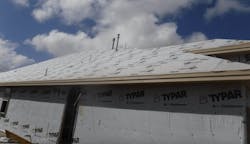
Roofing underlayment is a waterproof or water-resistant material that’s installed directly on the roof deck before any other roofing materials are applied. It acts as a barrier against leaks and the effects of harsh winds that may tear away shingles or ice dams and allow water to pool and seep under or penetrate through the roof cladding. It also can play an important role during the construction process, shielding roofs from severe weather prior to applying the finish cladding.
In fact, to satisfy the current International Building Code, a home’s roofing system must include an underlayment, and roof cladding manufacturers also require an underlayment to maintain their roofing products’ warranty.
RELATED
- Avoid Water Intrusion and Leaks: Penetration Flashing Done Right
- Preventing a Common Home-Building Woe: Water Intrusion
- 7 New Water-Resistive Barrier Products to Keep Homes Dry
But specifying a roof underlayment is one thing; to actually protect the home, that layer must be properly sealed and installed. And not all underlayment is the same or installs the same way.
Types of Roofing Underlayment
There are three basic types of roofing underlayment:
- Felt
- Synthetic
- Self-adhered
Felt underlayment, also referred to as roofing paper, is one of the oldest, most commonly used types of roofing underlayment available. Created by saturating paper or fiberglass mat with asphalt, this underlayment’s main advantage is that it tends to cost less than synthetic underlayment, and often, you get what you pay for.
Among felt's disadvantages is that it generally can’t be left exposed to the elements—especially to heat—for more than a few days because it tends to dry out or leach oils, reducing the underlayment’s effectiveness.
In addition, felt underlayment has a slippery surface, making it more difficult to install, and it’s prone to tearing in high winds and during installation. If exposed to moisture, felt can absorb water and wrinkle, making it harder to get shingles to lay flat. As such, the finish roof cladding should be installed immediately after felt roofing underlayment is applied to help ensure optimal weather protection.
Synthetic underlayment offers enhanced water resistance and protection from the elements, and for those reasons is becoming a more popular option than felt. Its long-lasting polymers provide added strength and longevity and are typically moisture-resistant. Installed correctly, synthetic underlayment offers better protection than felt does and it is also more durable, faster to install, has better traction to provide a safer working surface, and repels water better than felt underlayment. But it is also typically more expensive.
Self-adhered underlayment (also referred to as peel-and-stick or ice and water shield) contains high percentages of asphalt and rubber polymers, making these types of underlayment a highly water-resistant solution. They also require no mechanical fasteners to apply, and their sticky backing helps to create a waterproof seal between the roof deck and the underlayment. Self-adhered underlayments are also designed to protect the roof from damage where water tends to collect, such as roof saddles, crickets, and valleys, or in leak-prone areas, such as vent penetrations, chimneys, and skylights.
Self-adhered underlayments are useful in regions that receive severe winter weather. That’s because the upper surface of the underlayment may contain granulated polyethylene or polyester materials that provide additional weather-resistant benefits while also creating a nonskid surface that makes the underlayment even safer to install.
Roof Underlayment Installation Best Practices
For all underlayment types, first make sure the roof deck is properly secured and free of any damage or debris. As you roll out the underlayment, always follow the manufacturer’s requirements for a proper horizontal and vertical lap. For felt and synthetic types of underlayment, button cap fasteners are highly recommended because they provide a better seal and have stronger holding power, especially in high winds. Be sure to follow the manufacturer’s fastening schedule.
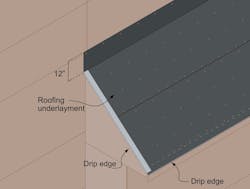
At high-risk areas such as skylights, chimneys, rakes, and shed walls, extend the underlayment 12 inches up the adjacent wall, then integrate it properly with the drainage plane, wall cladding, and roof flashing (see illustration, below).
Finally, apply drip edges to properly shed water off the roof, a best practice that also is required by code in several markets.
In most cases, synthetic or felt underlayment can be installed all of the way down to a 4:12 roof pitch, while self-adhered products should be used for all low-slope applications or risky areas down to a 2:12 pitch.
Drip-Edge Advice
In most markets, the drip edge goes over the underlayment along the rake edge and under the underlayment at the eaves (see illustration above). This practice helps to protect the roof deck and fascia, respectively, from wind-driven rain and decreases the possibility of leaks, rot, mold, and/or structural water damage.
Tips for Installing Underlayment on Roof Valleys, Hips, and Ridges
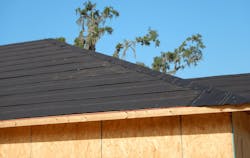
All roof valleys should be covered using a self-adhered underlayment because it offers the best protection against water leaks in what is one of the roof’s most highly trafficked watershed routes. When the underlayment passes into the valley, make sure it overlaps by at least 6 inches or passes through the entire valley. Remember to keep all fasteners out of the center of the valley by at least 12 inches. When installing over hips and ridges (see photo, below), overlap the underlayment by at least 12 inches.
A Word About Penetrations Through the Roof Deck
All penetrations through the roof deck, such as vents, plumbing stacks, and skylights, should be sealed and properly integrated with the roof underlayment so the roof is dried in against inclement weather. Remember to use a quality flashing boot and to install it in sequence with your cladding as a final layer of protection.
As you look to ensure that you’re providing a high-quality underlayment on the homes you build, there’s no doubt that synthetic and self-adhered underlayments provide better protection than traditional roofing felt. And for synthetic products, button cap fasteners in lieu of staple guns or roofing nails provide a better seal. Above all, remember that your underlayment layer should be capable of keeping your homes completely dry before the finish roof cladding goes on.
Clem Newcamp drives quality and performance in home building as a building performance coach on the PERFORM Builder Solutions team at IBACOS.
