If you're on the fence about whether to include rainscreen in the wall assembly of the homes you're building, consider the damage water can cause: mold and mildew growth, wood rot, structural irregularities ... It’s no secret that water is the No. 1 cause of damage to the building envelope. In fact, moisture damage is one of the most often-litigated aspects of construction in today’s market.
The fact is, a home’s exterior cladding isn’t designed—and should not be expected—to be truly waterproof. Rather, the finish provides a “skin” that sheds most of the water, usually in the form of rain or snowmelt, most of the time.
But when rain is accompanied by wind, it can drive water behind the cladding and cause water infiltration into the building structure, which can result in myriad problems.
Water always travels the path of least resistance, and when it gets behind the cladding it will find weaknesses in the water resistive barrier (WRB) and make its way into the wall assembly, leading to structural and finish damage as well as mold growth.
The probability of that dynamic increases in regions receiving more than 20 inches of rainfall per year. To defend against any rainfall, though, it is essential to properly apply a WRB (also known as the drainage plane) and properly execute the related flashing details.
In heavy rain climates, especially, consider taking it one step further by creating a rainscreen between the cladding and the WRB/drainage plane.
RELATED
- Building Envelope Solutions for Moisture Management
- Sill Flashing With a Water-Resistive Barrier
- Proper Flashing Practices for Fascia
- Best Practices: How to Frame Walls That Combat Moisture
What Is a Rainscreen?
The term “rainscreen” simply refers to an air space between the cladding and the WRB that provides a clear drainage path for water to escape once it infiltrates the building’s “skin.”
When properly vented at the top and bottom, the rainscreen also provides ventilation behind the cladding, which promotes drying and creates a capillary break between the cladding and WRB, expediting the evaporation process.
Brick or stone veneer walls with a 1-inch air gap—a practice required by building codes—are a common example of a rainscreen. However, when working with siding, stucco, and other types of cladding, you need to be intentional about creating this gap.
Best Practices by Cladding Type
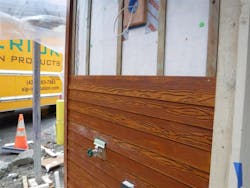
To create a rainscreen behind plank or panel siding, one approach is to use furring strips to hold the finish cladding away from the WRB by at least 3/8 inch.
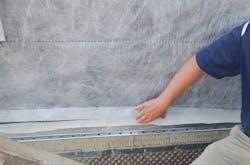
For direct-applied stone or stucco finishes, use a drainage mat to create a rainscreen. Drainage mats come in sheets or rolls and are applied over the WRB as a separate step in the building process.
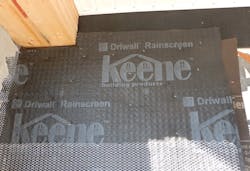
On some water resistive barriers, a rainscreen is already attached, which saves the extra step of applying a separate drainage mat. These WRBs usually cost more, but by reducing installation time and labor costs, as well as the potential for installation errors, it may pencil out to be a cost savings. Such WRBs also eliminate the need for additional holes or penetrations for fasteners, making the barrier even more reliable.
Regardless of how you think of and construct a proper rainscreen, you are miles ahead if you include that product and practice in your construction quality standards ... and enforce it.
In its simplest (and ideal) form, a rainscreen provides two lines of defense against water intrusion into the wall assembly: a drainage path that quickly expels water and a measure of ventilation to dry it.
Installing a rainscreen between the wall’s exterior cladding and a properly installed and flashed drainage plane is the most effective way to prevent water intrusion, rot, and mold growth.
Roy Fanara drives quality and performance in home building as a building performance specialist on the PERFORM Builder Solutions team at IBACOS.


