Despite its growing popularity, manufactured stone veneer is a material few builders fully understand. Without all of the right details executed correctly, water can easily penetrate this cladding and get trapped in the wall assembly. Unfortunately, only about 10 percent of installations we see in the field properly apply all of the necessary details.
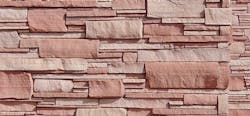
Part of the problem may be the name. Typically, manufactured stone veneer isn’t natural stone. The technical name for most of these products is “adhered concrete masonry veneer,” that is, concrete textured and colored to look like stone. “Adhered” is a tip-off that rather than being stacked over a concrete ledge with a drainage space behind it, manufactured stone veneer “floats” above a horizontal weep screed and is mortared to the wall over a wire lath, like stucco. That’s why it’s often called “lumpy stucco.”
Here are the most common problems and oversights I see with manufactured stone on production home jobsites:
Insufficient Drainage
Manufactured stone is a reservoir cladding, which means the material itself retains water. A successful installation creates a drainage space to let it out.
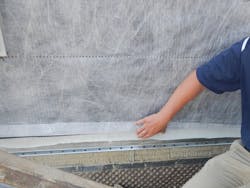
In addition to a properly installed water-resistive barrier (WRB), a second intervening sacrificial or “bond break” layer is essential. The type of three-dimensional housewrap used with stucco can work in dry regions, but in areas that get a lot of rain, there’s greater benefit with a drainage mat, which creates a drainage space about 10 mm thick. The mat is stapled to the wall sheathing over the WRB, with wire lath fastened over the mat. A layer of fabric separates the mat from the lath, letting moisture through but keeping the space from getting clogged with mortar during the cladding’s installation.
If you’re worried about cost, consider that some big builders (which scrutinize every penny) mandate drainage mats on all of their homes, including entry-level; they consider it cheap insurance against costly problems.
Missing Sealant
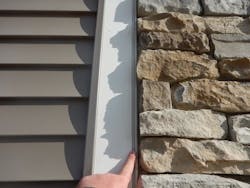
This detail is often neglected. Every vertical transition between manufactured stone veneer and another material, such as a window or a different type of siding, needs a casing bead and a 3/8-inch gap filled with backer rod and sealant.
Ignore it, and you create the potential for water intrusion as these materials expand and contract at different rates, resulting in an unsealed gap between them.
To make the job easier, manufacturers make a casing bead with a built-in backer rod that reliably bridges these gaps.
Going to Ground
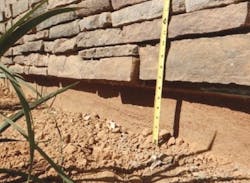
Customers prefer manufactured stone veneer to start at ground level, like real stone. But that creates a sponge for groundwater to eventually work its way up to the framing through capillary action.
The proper detail is to begin the veneer over a weep screed placed at least 4 inches off the ground, which mitigates the capillary effect and helps shed moisture.
Use a weep screed at roof intersections, too, but with a 2-inch separation. In some cases, you can continue the veneer to ground by using a weep screed where the foundation meets the framing. Otherwise you risk a host of moisture-related problems over time (think: mold, rotted framing).
Lack of Standards
Few builders have written specifications for installing this material, and those that do seldom update those specs and details to reflect the products they are actually using. In addition, it’s rare for builders to inspect the work as it is being done or upon completion.
The National Concrete Masonry Association publishes installation guidelines for manufactured stone veneer. Insist that your installers follow those guidelines and have their work inspected. And update your written standards to protect your company’s reputation and financial health.
Richard Baker is program manager of the PERFORM Builder Solutions team at IBACOS.


