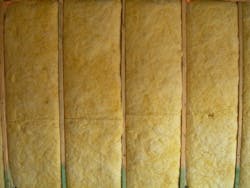
While most new homes with fiberglass batts are insulated reasonably well, it’s surprising how many of those homes have numerous energy-robbing defects. That’s because mediocre practices are still observed today in many new homes under construction. With all due respect to adding R-value, many builders could get even more comfort and efficiency gains by scrutinizing insulation details.
Insulation details are rated on a three-step scale from the Residential Energy Services Network (RESNET). A standout job has those specified by Grade 1. Batts in a Grade 1 job are fully lofted with no more than 2 percent of their volume compressed. (If using kraft-faced batts, it’s key to avoid inset stapling to the inside face of the studs. This creates unnecessary compression. Instead, face-staple the extended tabs of the kraft facing or consider friction-fit batts.)
The insulation must also be snug against the drywall, sheathing, and framing on all six sides with no gaps or voids. Gaps include even small uninsulated spaces such as those behind electrical boxes; these create cold spots inside walls where moist air can condense. Insulation must be sliced to fit around and behind wires, pipes, electrical boxes, and blocking; stuffing it behind or in front of these elements creates voids and compression.
Reaching a Higher Standard
If you want to qualify for Energy Star or other above-code programs, the rater will look for these details and may even peel back batts and vapor retarders in random areas to inspect the work.
Requiring Grade 1 isn’t asking the insulation contractor for anything but a quality job—something that contractor should want to do anyway. And it shouldn’t add much expense. If you don’t participate in programs such as Energy Star or Environments for Living, think of Grade 1 as cheap marketing. The few extra dollars you may pay for a top-notch crew are a tiny fraction of the value you get from an objective quality measure that you can advertise to potential homebuyers.
Checklist for a Grade 1 Batt Insulation Job
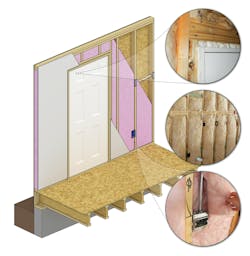
Use the illustration, below, and follow this best-practices checklist to ensure you’re getting what you pay for from your insulation contractor.
Top: Properly air seal windows and doors;
middle: cut batts to fit and completely fill the cavity;
bottom: split batts around obstructions
• The insulation must completely fill the cavity. It should be pressed into the back of the cavity and then gently pulled by the face to the front of the cavity, allowing it to expand to full loft.
• Batts should be cut to accurately fit the cavity. If the batts are to be friction-fit, they need to be cut so they are no more than about ½ inch wider than the stud bay. Leaving them excessively wide to ensure they stay in place will compress them while it causes voids to be created next to the studs. Cutting batts too narrow leaves voids along the edge of the cavity.
• Batts should be split to pass on both sides of wire and pipe obstructions that pass through the stud cavity.
• Don’t stuff insulation around windows and doors. Use backer rod and sealant or low-expanding foam, which also creates an air seal.
• Finally, insulated cavities should be encapsulated on all six sides with draftstopping. Reference this previous article on draftstopping for tips to get it right at tough areas such as knee-walls, bathtubs, and fireplaces (see “Draftstopping for Optimal Home Energy Efficiency”).
Richard Baker is program manager of the Builder Solutions Team at IBACOS.

